Octodash works with octo4a? Yes!
Introduction
We all know that using the Octo4a APP allows you to install Octoprint on your Android phone (If you don’t know, take a look at [YouTube]How to run OctoPrint on your phone!), so you can use your phone as a controller to control your 3D printer. But if you want to check the state of your printer or do some manipulation, you can only do it by opening the management page of Octoprint through the browser. Although the display layout on the mobile phone can be optimized after installing the Custom UI plugin, you still need to scroll to see more Information. It would be so much nicer if Octodash can run on your phone. Now I did it, I’m sharing the steps with you, hope that it will help you achieve this.
Ideas
- You need an Android phone that has Octoprint installed and configured
- Install Termux on your phone
- Install the PRoot distribution for Debian in Termux
- Install Octodash in Debian
- Install Xserver XSDL on your phone
- Test running Octodash under Debian in Termux
- Add Octodash as a service in Termux and enable automatic startup
- Done, use Octodash in Xserver XSDL
Start
Install Termux
Download and install the latest version of Termux from Github Releases. If you have the ability, you can start the SSH server to facilitate the next operations from the computer.
Install and enter the Debian system
1 | pkg install proot-distro |
Install Octodash
Install dependencies
Made some modifications to the commands of the installation guide to suit the current system
1
2
apt update -y
apt install -y libgtk-3-0 libnotify4 libnss3 libxss1 libxtst6 xdg-utils libatspi2.0-0 libuuid1 libsecret-1-0 libasound2 libgirepository-1.0-1 gir1.2-glib-2.0 libayatana-appindicator3-1Download and install the latest version of Octodash (replace the download link with the link on the
Github Releasespage for the latest version)1
2wget -O octodash.deb https://github.com/UnchartedBull/OctoDash/releases/download/v2.3.1/octodash_2.3.1_arm64.deb
dpkg -i octodash.debInstall Xserver
1
apt install -y xserver-xorg x11-xserver-utils xinit libgtk-3-0
Install Xserver XSDL
Install the latest version of Xserver XSDL from Google Play Store
After installation, open the APP, press Change device config button during app start, select Mouse emulation -> Mode -> Desktop.
Return to the startup page after completion, wait until connection info shows up like below, remember the port number, for example, mine is 4713.

Test Octodash
Go back to the Debian system under Termux and create the script file (if your port is different from mine, replace it)
1 | cat << EOF > /root/startdash.sh |
Run the script file to test if Octodash is working properly
1 | /root/startdash.sh |
If you see that there is information output and no error is reported, switch back to the Xserver XSDL APP to check whether the initial page of Octodash is displayed at this time.

If you see it, don’t rush to set it up. After the test is passed, you need the next step: Add Octodash to the Termux service to ensure that it runs in the background.
Configure the Octodash service
Return to Termux app, first Ctrl+C exit the current script, then Ctrl+D exit the current terminal, return to the Termux terminal, and continue the following operations.
After ensuring that you have returned to the Termux system, install the termux-services package to enable Termux to support services
1 | pkg install termux-services |
Create a service for Octodash
1 | mkdir -p $PREFIX/var/service/octodash/log |
Start the Octodash service and set it to start automatically
1 | sv up octodash |
The log files are located at
$PREFIX/var/log/sv/octodash/currentwhat can be done with
sv:
2
3
sv down octodash #Stop the service
sv-disable octodash #Close the service to start automatically
Finish
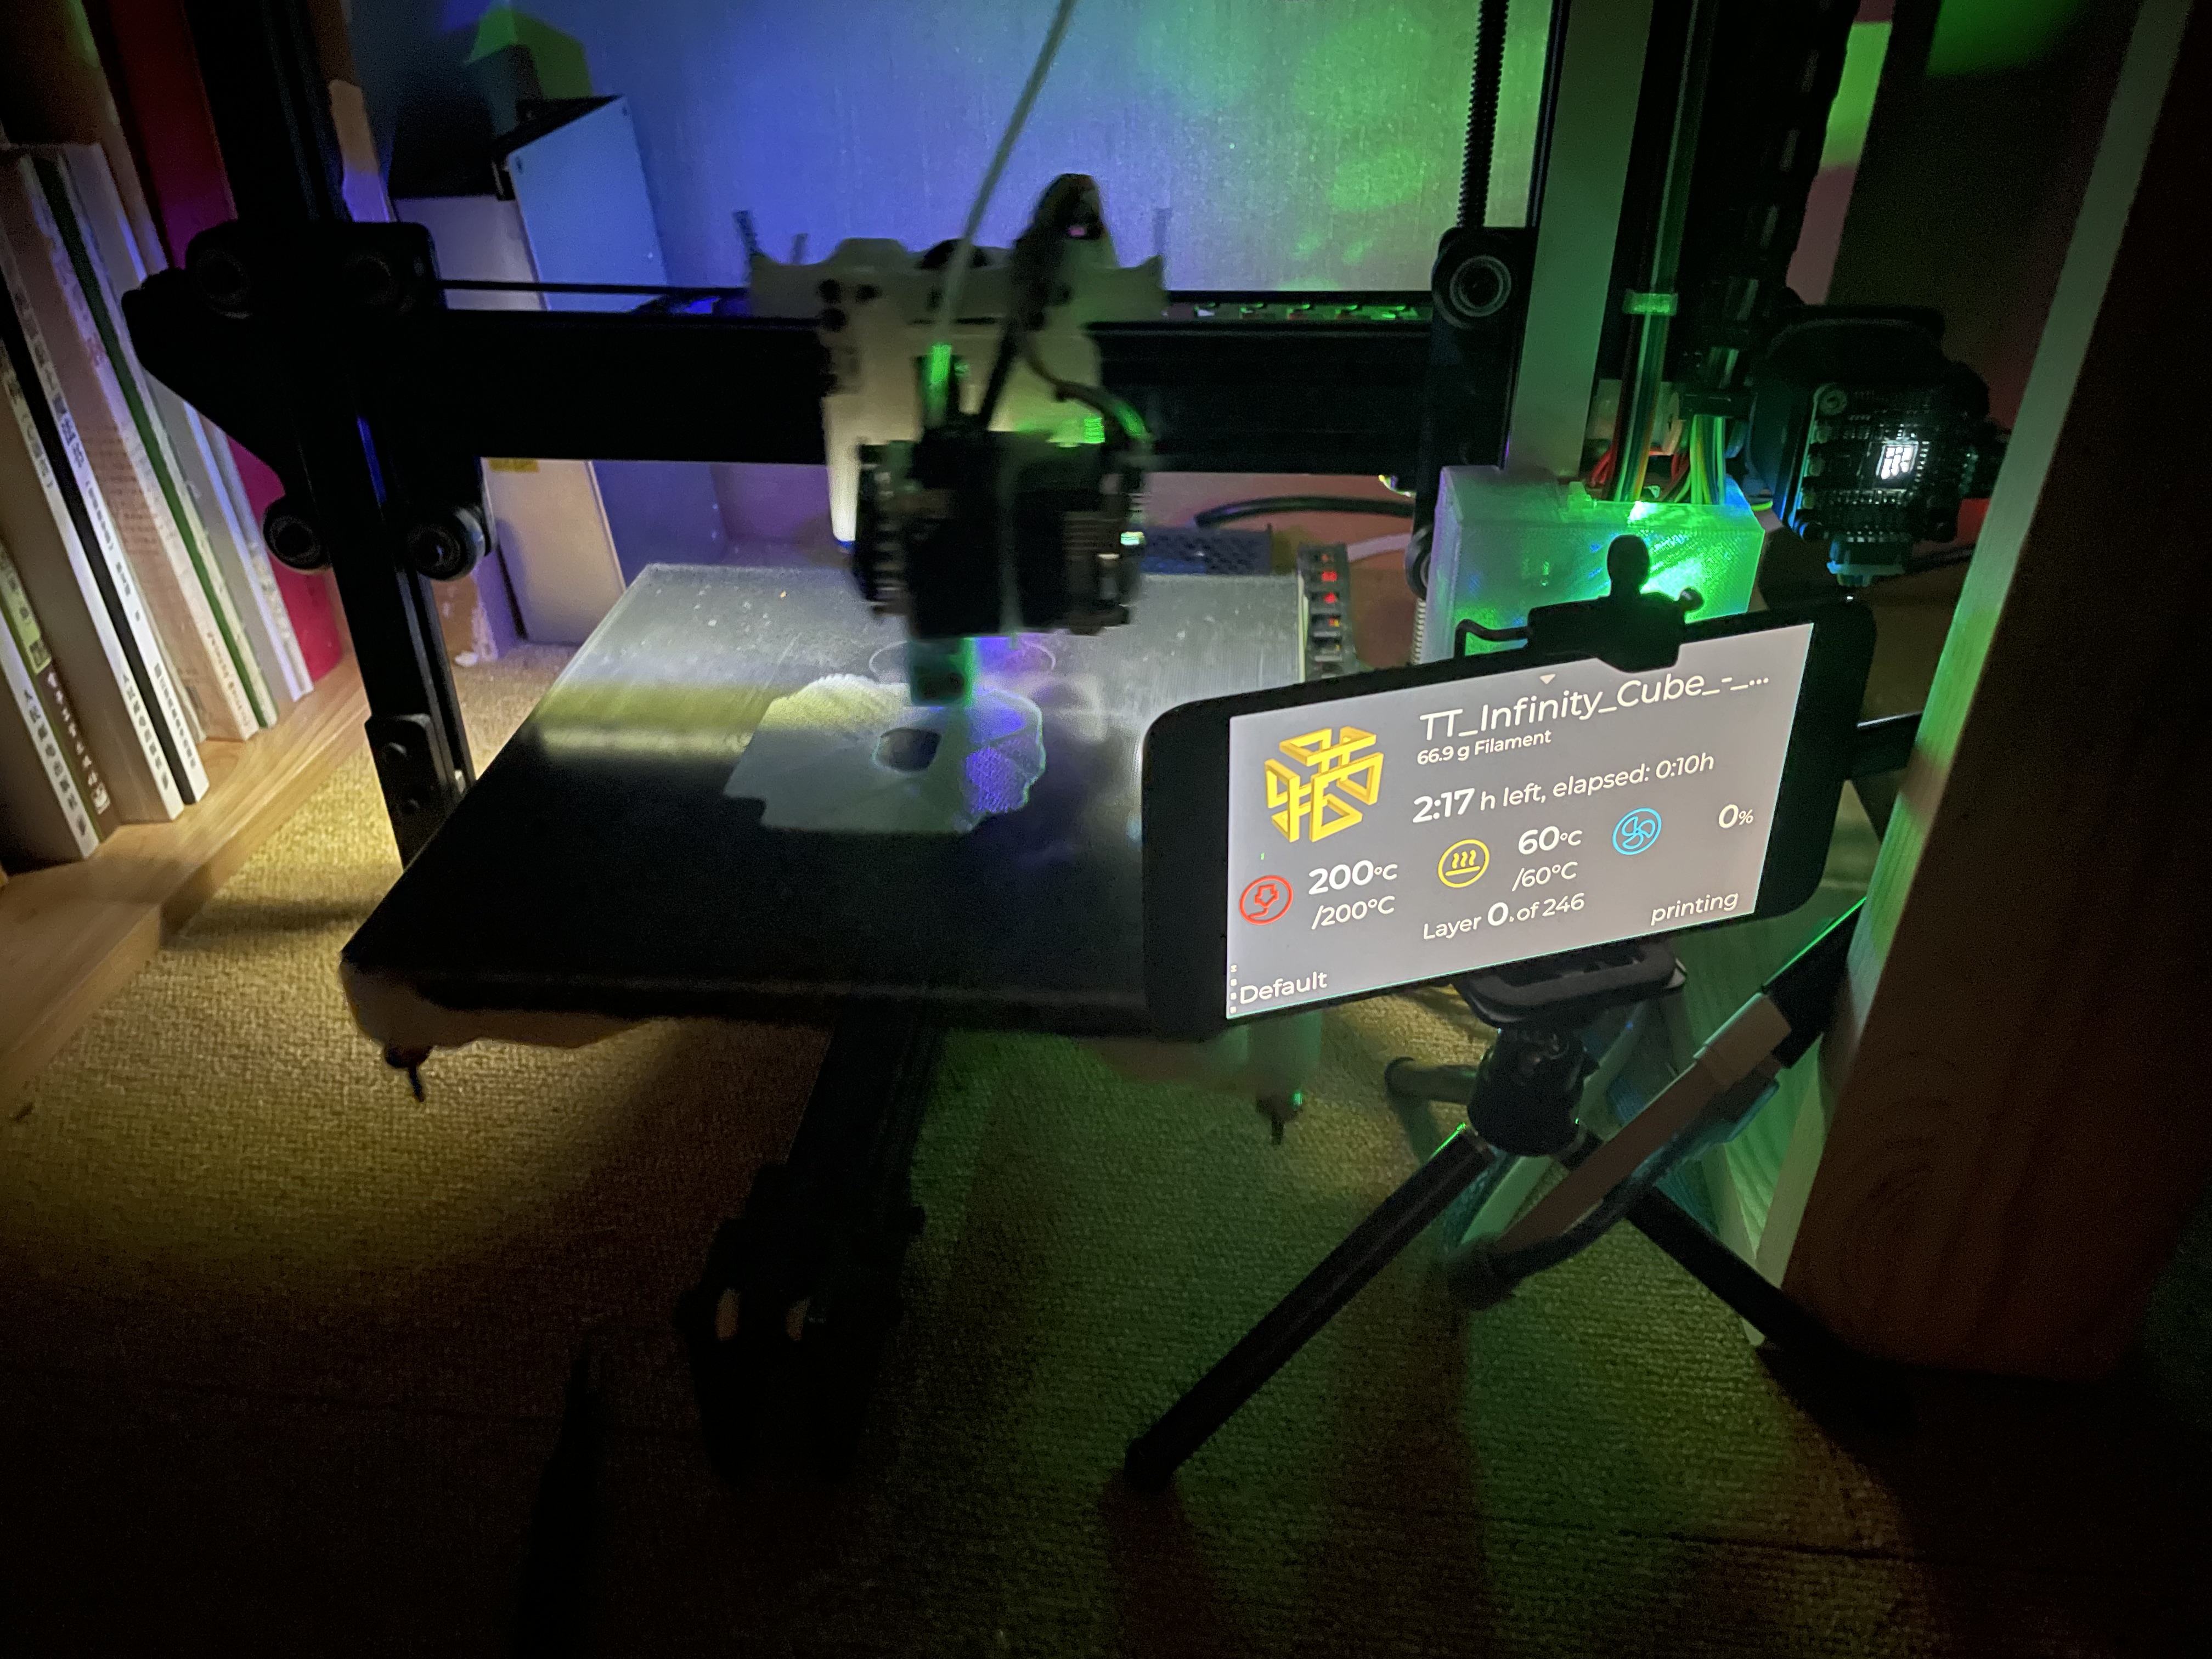
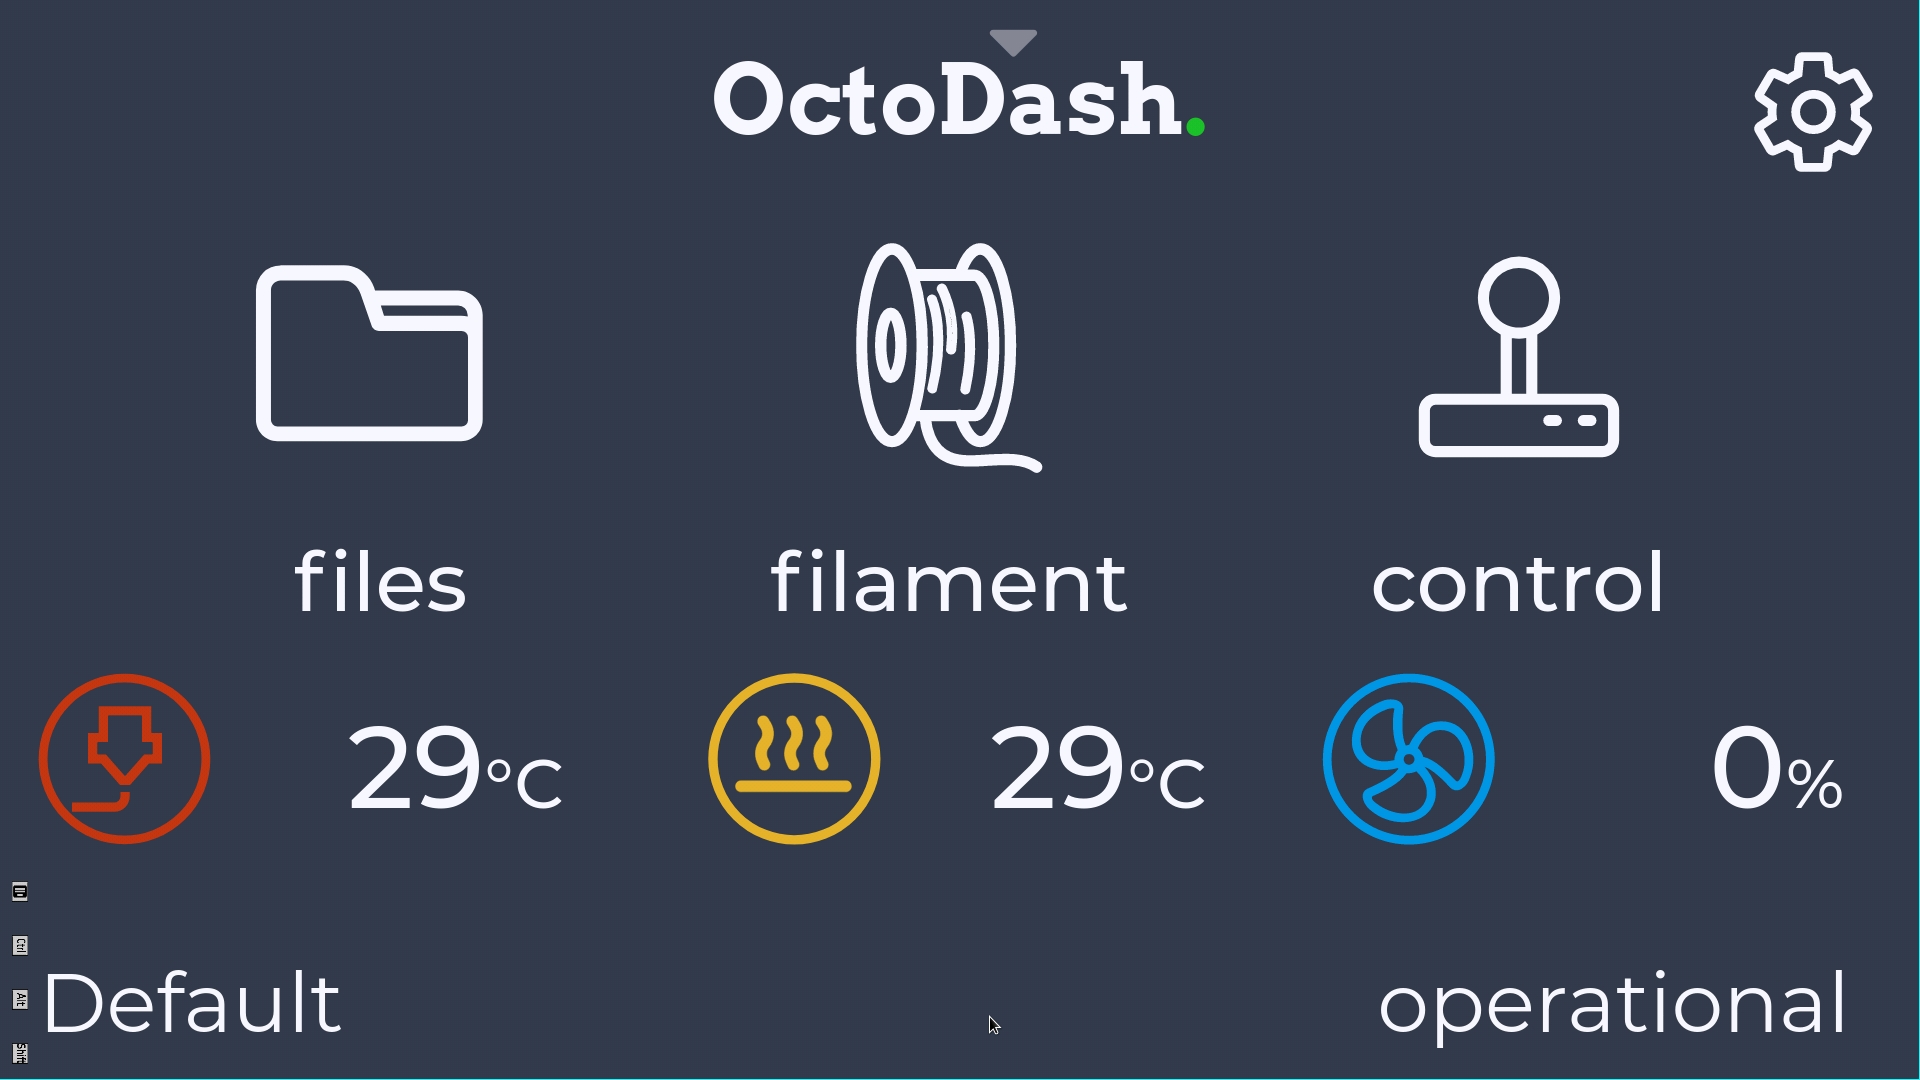
Now you can go back to the Xserver XSDL APP and continue the initialization of Octodash. After the configuration is complete, you can see this interface
If the printer address 127.0.0.1:5000 cannot be added successfully, enter the LAN IP of the mobile phone to connect to add it.
You’re all done, if you archived this, please share your results in the comment!
Some notes
In the process of configuration, the experience and tips of some problems are summarized:
If your phone doesn’t have battery protection and keeps charging to 100% all the time, your battery will be bulging after a while. It is recommended to download the Scene 4 mobile phone management tool. In the tool, you can adjust the battery charging strategy. After charging to 90%, stop charging, and continue charging when the battery drops to 70% to protect the battery. Download link: https://github.com/helloklf/vtools/releases
The Webcam server that comes with Octo4a has the following problems (for MI6):
- The resolution cannot be set, and the snapshot resolution is extremely low, resulting in a very low resolution of the generated time-lapse video
- You can enable auto flash when you stream video, but you can’t enable it when you take a snapshot
- The camera emits shutter sound every time a snapshot is triggered, even after change to mute mode
To sum up, I finally used a separate Webcam software: IP Webcam , which solved the above problems. It can also modify the configuration on the web page, which is very convenient
If you also change the video source, remember to update the system settings in Octodash and the settings of the octolapse plugin at the same time
Every APP mentioned in this article must set a background lock, and turn off the power saving policy of these APPs to keep it running in the background all the time.